World Domination Part 3 Making a headphone amplifier. The Banzai Cmoy V2

idc

Well-known member
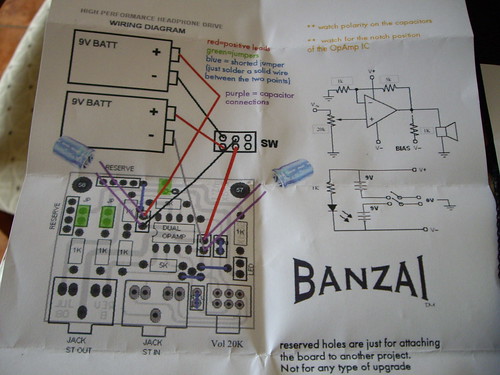
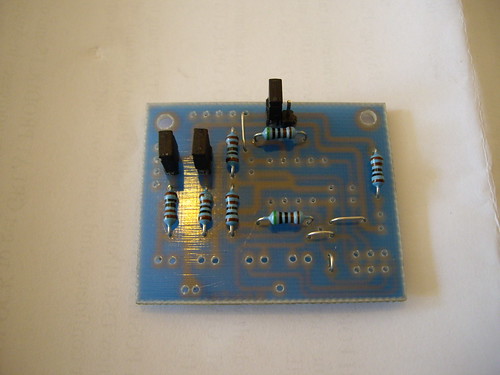
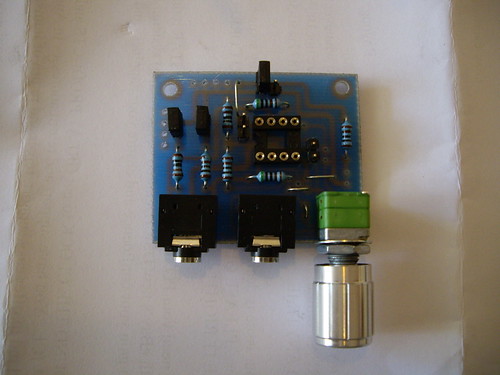
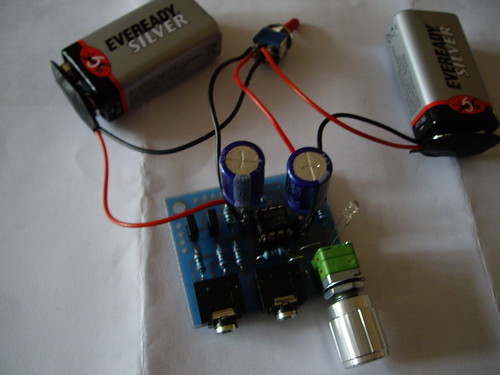
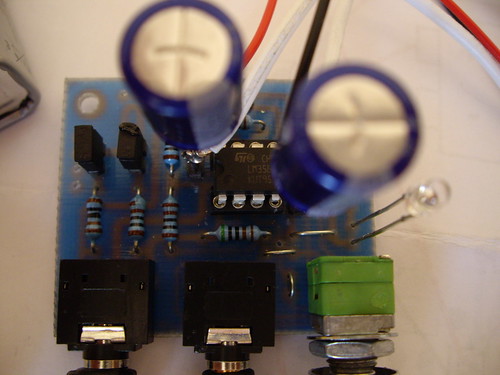
This is all going to work really well, or not work at all. But, with no knowledge what so ever, I am going to build a Banzai Cmoy V2 bass boost headphone amplifier out of a kit bought off ebay. The kit originally comes from www.electricsumo.com. The first problem was the lack of instructions. There is a poor wiring diagram provided. I had a look for a guide on the internet, but whilst there are loads of guides to build cmoys, they all look different and are variations on a theme.

The kit......

4925684131_c479095b9a.jpg


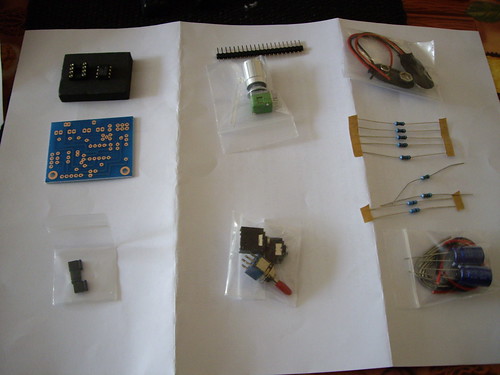
The instructions.....

4926279058_34ffdb9ac3.jpg
 

idc

Well-known member
I decided to start with the resistors and the smaller fiddly stuff first, so I have the most space to do that. In the diagram there are a number of spacers(?) or wires that just go from one hole(?) to another. No wire is provided, so I used the cut ends of the resistors. I bent the resistor wire and pushed it through the hole and then cut the end with scissors before I soldered. A slight bend kept each resistor in place when the circuit board was turned upside down to do the soldering. I have a helping hand stand to hold the circuit board.

4926279430_9e19524951.jpg


4925685265_92e0802b9a.jpg
 

idc

Well-known member
Then I fitted these things, no idea what they are. You break off the spike bit from a row of them and fit the cap ontop, push throuhg the holes and solder.

4926280388_4e4a40a80d.jpg


The circuit board with the resistors, black things and spacers fitted in place.

4925686419_c2fd10c435.jpg
 

idc

Well-known member
Then and this was fun and simple, I fitted the base for the opamp in the middle, the two jack plugs and the volume control.

4926281394_90f5d6ee00.jpg


Left are the LED, two big capacitors, the leads to go to the batteries and the on/off switch. But The diagram does not even include details of where that switch goes.

I have also to buy a box for it all to go in. Most commonly used are Altoids tins used for sweets. I have got my eye on a groovy plastic box from Maplins.
 
idc:

Then and this was fun and simple, I fitted the base for the opamp in the middle, the two jack plugs and the volume control.

4926281394_90f5d6ee00.jpg


Left are the LED, two big capacitors, the leads to go to the batteries and the on/off switch. But The diagram does not even include details of where that switch goes.

I have also to buy a box for it all to go in. Most commonly used are Altoids tins used for sweets. I have got my eye on a groovy plastic box from Maplins.

Given your endeavour and ingenuity, idc, you should be rewarded.
 

8009514

Well-known member
Jan 7, 2008
72
0
18,540
Visit site
Looks good to me. Little tip for you. When you turn the board over for soldering, if you rest it on a piece of sponge it'll save you having to bend the wires to keep the component in place. (sponge keeps it nicely in position). Doesn't sound important I know, but if you find you've put something in the wrong holes or a component breaks down it's a lot easier to remove that component if the wires are straight instead of bent.

Look forward to updates

Rich
 

8009514

Well-known member
Jan 7, 2008
72
0
18,540
Visit site
Audiofoolius:Great topic! Thanks for yours insights, idc! Just out of curiosity: what headphones do you have?

Ha! He's got dozens of them. Click on his name 'idc' for full list.

Rich
 

idc

Well-known member
Thirteen headphones in the collection so far
emotion-2.gif


Today I finished off, but problems. The red and black wires have hardly any actual wire in them and various attempts to solder one end to the capacitors and the other end to the switch have failed. So the wires are getting shorter and shorter......at least the LED comes on and I have had some sound out of it.

4929187359_49ca593309.jpg
 
A

Anonymous

Guest
A few friends and I have been talking about ordering the parts to build different variations... the kit you used is SUPER cheap, and all-in-one... so you don't have to order parts from 4 different stores/sites to build it... but, how does it perform?

Would you recommend it?
 

idc

Well-known member
A mate came around to give me a hand. We ended up at Maplins to get a new opamp (LM358A for 67p) and some new battery leads. The supplied ones have hardly any wire in them. I also replaced the same rubbish wire for the other leads to the switch with white bell wire I had.

4936824451_87aba677e9.jpg


4937410656_5bc0e9a15f.jpg


Sadly, I am only getting music out of one channel, the left one. There is a lot of crackling when I put the headphone jack in the signal out (socket to the left) and as I say only one channel. I am undecided as to what to do
 

TRENDING THREADS

Latest posts