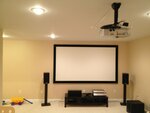
In recent times, the projectors are made very optimized to suit the home theater system in the best possible way. Setting up the projector is very easy and only require you to choose the appropriate size of the screen and to decide the correct distance of the projector from the screen. Here is how you can easily set up the projector for your home theater system without any chaos or worry about the placement of projector on your ceiling wall.
‘Step 1’
‘Choose the throw distance’
Bigger the size of the screen, farther must be the distance between the projector the screen on the wall. This distance is known as the throw distance. Measure the screen size before you decide the distance you place the projector from the screen ‘Throw distance must be larger’ for bigger projector screens.

‘Step 2’
‘Decide the HDMI cable length’
‘Measure the distance across the ceiling and down the wall’ to choose the best appropriate HDMI cable. If you plan to buy 10- or 15-feet long wire, HDMI active cable or fiber HDMI cable can be used.

Step 3
‘Place the socket and have raceway cover the wires’
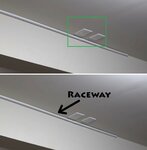
To place the projector on your ceiling, you need to have some wiring to have a smooth flow of electricity. ‘Place the socket’ on the ceiling at the right place. It is recommended to have the wiring done by the electrician and you can use ‘Raceway’ to cover the wiring as shown in the second image below.
‘Step 4’
‘Decide on the placement of the projector’
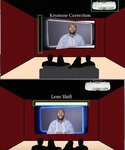
Keystone correction and lens **** are two major characteristics that will determine the projected view. Based on what you desire, you can ‘Move the keystone correction’ to change the angle of projection as shown in the first image. Similarly, you can change the ‘Lens shift setting’ to change the projecting position.
‘Step 5’
‘Attach the projector screen to wall’
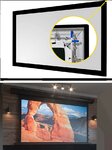
Now, you need to get the right projector screen. There are different types of screens, the most common one being white and grey with border and borderless option. Below is the image of the black bordered ‘Projector Screen’ and you can attach the screen to the wall easily. There is another model of projector screen which can be rolled up and down when necessary as shown in the second image.
‘Step 6’
‘Use the projector mount to fix the projector on the ceiling’
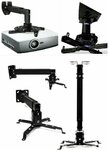
To make your projector project to the screen attached on the wall, ‘Use the projector mount’ to fix the projector on the ceiling. It is important to use the best type of projector mount based on the type of your ceiling.
‘Step 7’
‘Find the ceiling joints using stud finder’
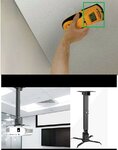
You can ‘Use the stud finder to find the ceiling joints’ to get the best place to fix your projector on the ceiling. If you ceiling is rounded and not flat, you might have to make arrangement to give it a flat surface before attaching the projector.
‘You can now easily set up the projector for your home theater system by following the above steps’


