Raspberry Pi is a very cost-efficient card sized computer device that can be connected to a Tv or monitor screen along with the keyboard and mouse. One can easily create a simple audio system using the Raspberry Pi with the help of the latest Raspbian software. This method is very cost efficient and would not cost you much. Here is how you can easily create the audio system using the Raspberry Pi.
Step 1’
Use the PiDrive Node Zero ‘
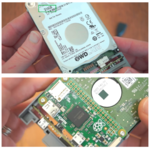
To create the audio system using the Raspberry Pi, ‘Use the PiDrive Node Zero’ . This is basically a 314 Gb hardware drive with a Raspberry Pi Zero grafter on to it.
‘Step 2’
‘Use the Couple of full-sized USB ports’
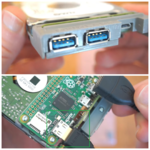
The PiDrive Node Zero will also have a couple of full-sized USB ports as shown in the below image. They also include a ‘Mini HDMI adapter cable’ and also a microSD card preinstalled with the custom version of Raspberry Pi NOOBS software
‘Step 3’
‘Install the latest Raspbian software’
Now make sure to ‘Install the Raspbian software’ to create your own audio system. Follow the installation steps and make sure to format and put the Raspbian image on it.
‘Step 4’
‘Insert the pre-installed Raspberry Pi software card’
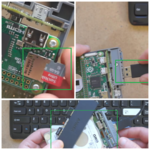
Boot up the ‘Node Zero with the card installed’ and a Wi-Fi adapter, keyboard and a USB mouse connected.
‘Step 5’
Click ‘Preferences’ option
In your desktop, ‘Click the Preferences’ option as shown below. Then in order to include the Raspberry Pi software, click the ‘Add or Remove Software’
‘Step 6’
Type ‘gparted’ and click ‘apply’
In the Add/Remove software dialog box, ‘Type gparted’ as shown below. Then type ‘raspberry’ as the authentication password and then click the ‘Apply’ button.
‘Step 7’
‘Open gparted and select the drive’
Open gparted to create the partition related to the raspberry pi software. To do so, you need to format the disk space, click the ‘Drive that has larger space’ as shown below.
‘Step 8’
Click the ‘Device’ option
Now, click the ‘Device’ option as shown below. Then click the ‘Create Partition Table’ option to create the partition and format the drive.
‘Step 9’
‘Click Apply button’
Now, ‘Click the apply’ button as shown below to erase and format the entire disc associated with the raspberry pie. Follow the steps of creating a new partition by using fat 32 file systems and then ‘Reboot’ your system.
‘Step 10’
‘Insert the removable disc and load the files you want’
Select the music files you need and add them to the folder you created. ‘Click OK’ to open the disc in file manager and have the music files stored in it. This way, you can easily create a new audio system using the raspberry Pi.
‘Here is how you can easily create an audio system using the Raspberry Pi by following the above steps’


