- Mar 26, 2021
- 696
- 260
- 11,270


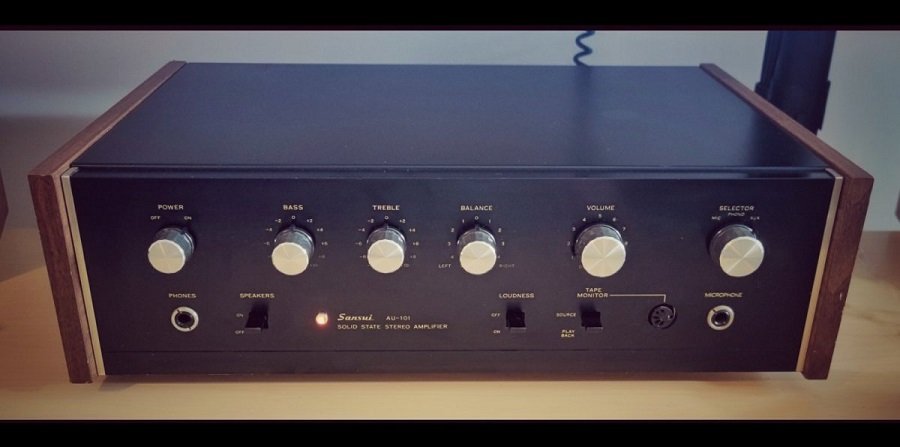
A little success in a search for a Sansui AU-101 for a reasonable price paid out well. I already had servicing in mind with it. And last week I became a proud owner of a AU-101. I think it looks 'almost' like a set with my Denton 85th anniversary edition loudspeakers.
A short pro's and cons
+optically well designed
+ receives positive reviews for its destinctive tube-like signature sound
+ Basic functionality, no loads of switches and more direct pathways
- not many connection possibilities as with most old amps
- the headphone and microphone ports could have been less emphasised by rings and more hidden in the surface.
- wish I could erase the microphone port 😉
Disclaimer: the pictures below are from another source online.
So far my checklist
-replaced an ancient white power plug with a good looking modern black one.
- completed external cleanup and fine surface cleaning. Optically it almost looks as new again. The interior looks like it has never seen dust at all.
- having it serviced (low hum and some issues with the sound, headphone connector block needs a bit of attachment, tape monitor switch is broken off, but in right position. Will see if I can have it replaced)
further plans
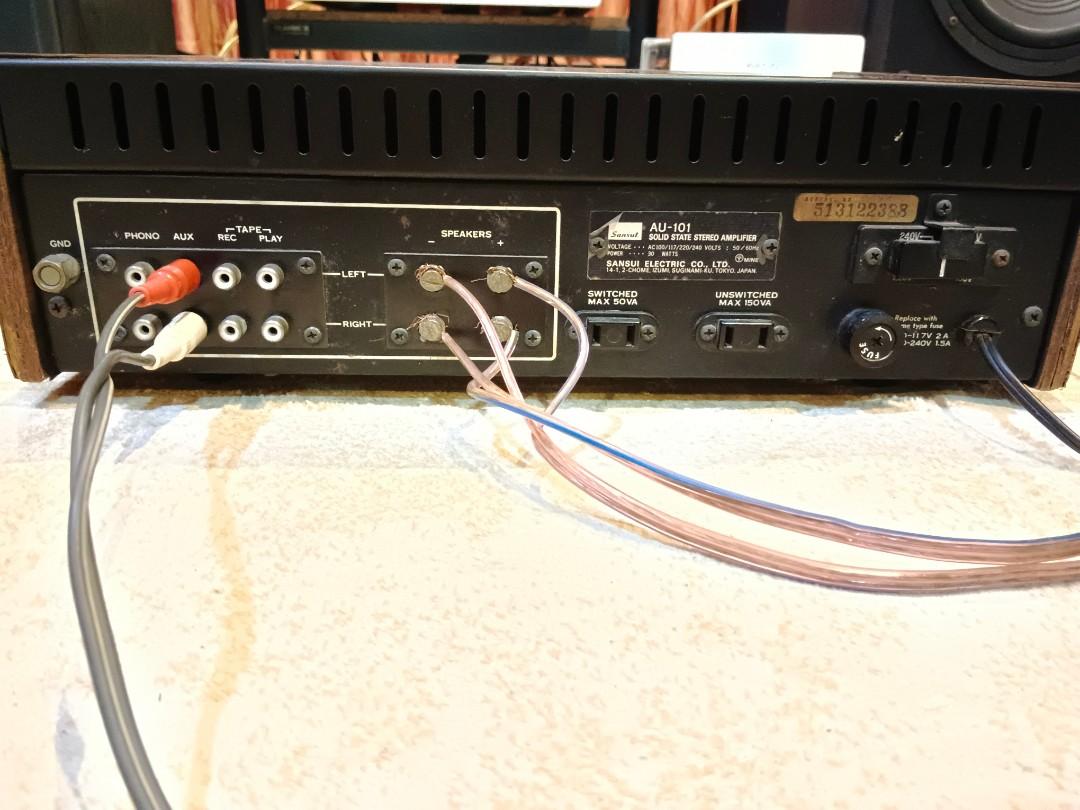
- I would like to add binding posts to be able to attach banana plugs (it just has plain screws; as prehistoric as it can be) and find matching ones will be on the list. Fun fact. I can stick bananaplugs in the screw openings, but lets do it well.
-planning to sand the wooden side panels a bit and add new verneer.
-Give the cover a fresh layer of black spray paint
- replacing the black plastic switches with brass ones maybe. Though I might stick with its original plastic ones.
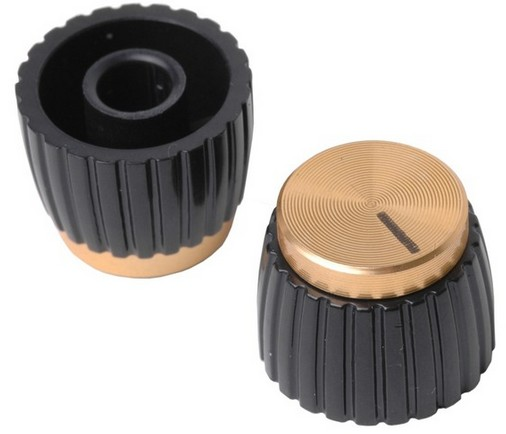
- The original dials are a bit off compared to the rest of the amp. I think about replacing the front knobs for these below. Giving it more of a uniform look and a optical upgrade. It fits with the lettering and the side strips.
A short pro's and cons
+optically well designed
+ receives positive reviews for its destinctive tube-like signature sound
+ Basic functionality, no loads of switches and more direct pathways
- not many connection possibilities as with most old amps
- the headphone and microphone ports could have been less emphasised by rings and more hidden in the surface.
- wish I could erase the microphone port 😉
Disclaimer: the pictures below are from another source online.
So far my checklist
-replaced an ancient white power plug with a good looking modern black one.
- completed external cleanup and fine surface cleaning. Optically it almost looks as new again. The interior looks like it has never seen dust at all.
- having it serviced (low hum and some issues with the sound, headphone connector block needs a bit of attachment, tape monitor switch is broken off, but in right position. Will see if I can have it replaced)
further plans
- I would like to add binding posts to be able to attach banana plugs (it just has plain screws; as prehistoric as it can be) and find matching ones will be on the list. Fun fact. I can stick bananaplugs in the screw openings, but lets do it well.
-planning to sand the wooden side panels a bit and add new verneer.
-Give the cover a fresh layer of black spray paint
- replacing the black plastic switches with brass ones maybe. Though I might stick with its original plastic ones.
- The original dials are a bit off compared to the rest of the amp. I think about replacing the front knobs for these below. Giving it more of a uniform look and a optical upgrade. It fits with the lettering and the side strips.
Last edited:


 Twitter