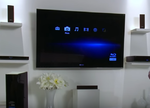
Going out to theatres to watch your favorite movie is too old-fashioned. Fashion your own wireless home theatre system and you will never have to pay for expensive popcorn and drinks at the movies! The setup is easy, and you will not need an ethernet port. This tutorial will walk you through the steps required to set up a wireless home theatre system.
Step 1
Connect your TV to a wireless network
Connect your TV and other home theatre units to a Wi-Fi network wherever they are placed in the room. This will make your system accessible through the internet.
Step 2
Finish the Wi-Fi setup
Finish connecting your TV and other units to Wi-Fi using the setup options provided on the onscreen display. This will prepare the home theatre system for wireless transmission.
Step 3
Plug in the transceiver unit
Connect the transceiver unit to a power outlet. The transceiver sends a wireless signal to the speakers set up in the back of the room.
Step 4
Position the speakers
Place two of the speakers beside the TV on its either side. Put two other speakers in the back of the room, pointing towards the seating area. Position the fifth speaker below the TV. Place the subwoofer on towards any one side of the TV. This arrangement will give you the best sound throughout the room.
Step 5
Turn on the system
Turn the home theater system on and stream your favorite content. The home theatre system is now set up.
Enjoy a theatrical experience watching your favorite movies and TV shows on your wireless home theatre system, right from your sofa!


