So, here's another little guide from me for anyone that owns one of the Digital Stream DHR-820xU boxes (I use the DHR-8205U) and wants to transfer something they've recorded to their PC. From there, it can be burnt to DVD etc. This can only be done for Standard Definition programmes at this time, as, although HD recordings can be archived to USB disk now (from version 4.02 of the software), these recordings are encrypted so can only be played on a Digital Stream box - though any DS box will allow them to be played which is nice if you have one in another room or perhaps the Digital Stream DPS-1000 IP TV streaming box.
First things first, you need a USB hard drive with at least 160 GB space available on it. Make sure there is nothing on it you want as you'll need to format it from the Digital Stream box. Connect this to the Digital Stream box using a standard USB cable and format it to make it available, then use the white Func+ button to copy the programs to the disk. Full instructions on doing this are already posted in my review of the DS box
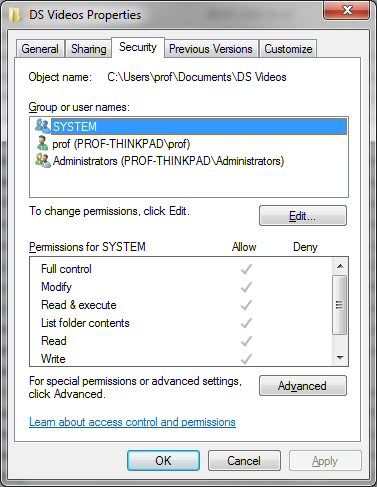
2. Have a look at the permissions in the Group or user names box. If Everyone is not listed there with a tick to indicate Write access, click Advanced. If it does, you can press Cancel and skip this and go to step 9.

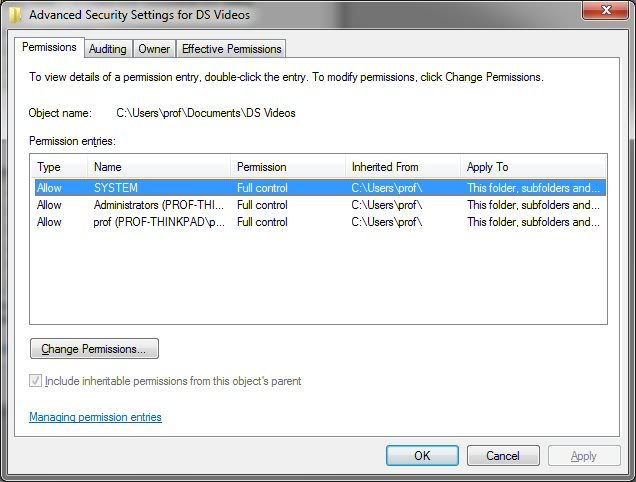
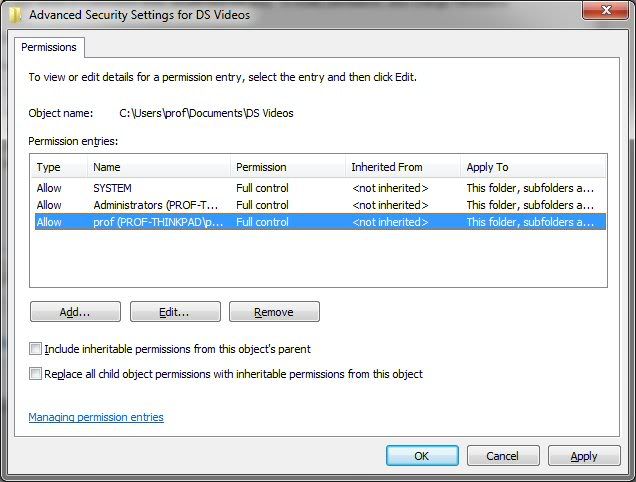
3. Click Change Permissions.

4. If ticked, untick the box Include inheritable permissions from the object's parent and click Add to add these permissions explicitly.


5. Now the box is unticked, click Add.

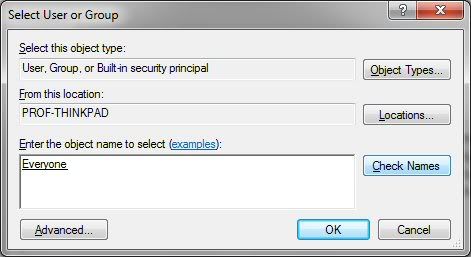
6. Type Everyone in the Enter the object name to select box and click Check Names - you should see Everyone underlines itself. Click OK.

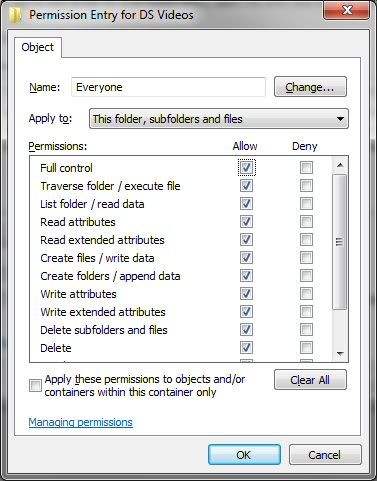
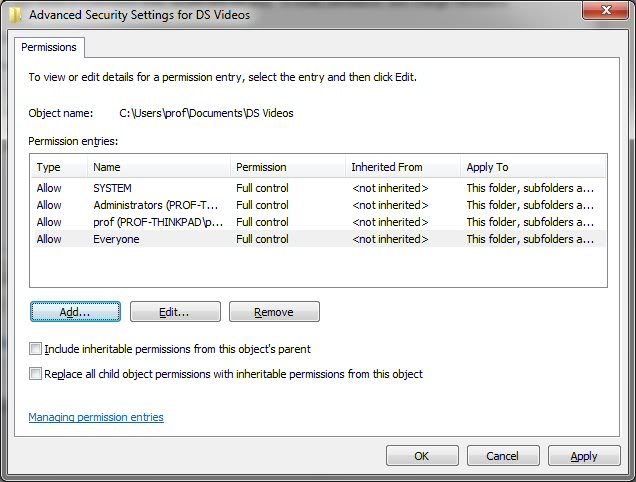
7. In the window that comes up, tick the Full Control box at the top under the Allow column - all other boxes should then tick then click OK.

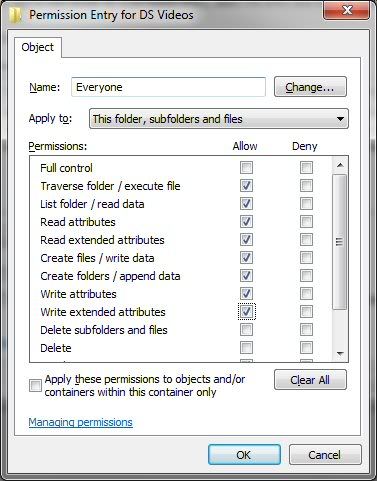
NB - if you don't want to allow full control to everyone, you can tailor the permissions to be a bit more secure e.g. in the below screenshot, you can see Everyone only has Read, Create and Write permissions, not Delete.

8. The permissions for the Everyone group can now be seen as you set them. Click OK, OK and OK again to complete the process.


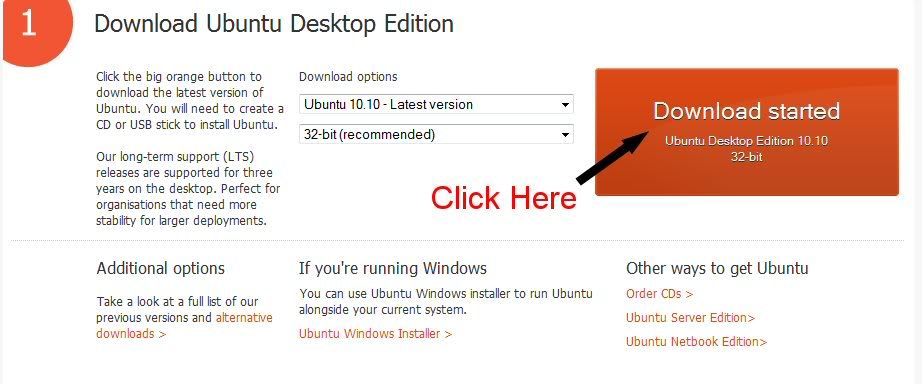
9. Now, download the Ubuntu Live CD from their website by clicking here and clicking on the Start download link.

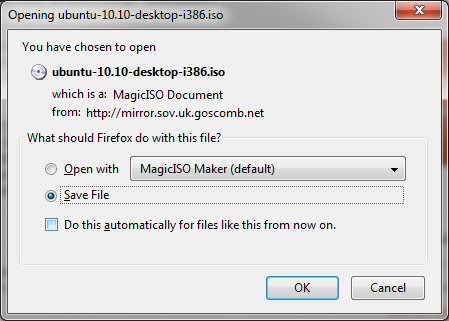
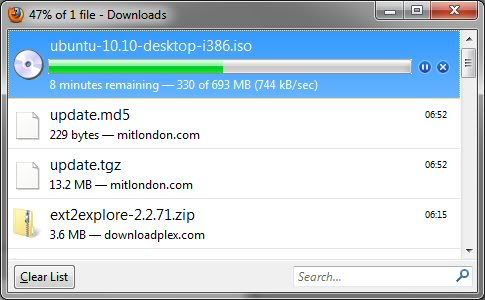
10. If prompted, click to save the ISO file and choose somewhere to save it on your hard disk, then wait for it to download.


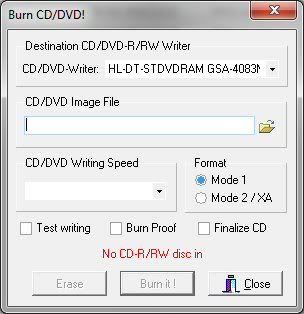
11. Now, you need to burn this ISO file to a CD. However, you don't simply want to copy the file as is to a CD, you need to create a disc from the image contained within it. I personally use a bit of software called MagicISO, but most standard CD / DVD burning software can do it. It's normally accessed from Create Disc from Image or some such description. Step 11a - 11e contains instructions on how to do this using MagicISO. If you have other software, do it with this and skip to step 12. If you're stuck on how to do this, try looking at
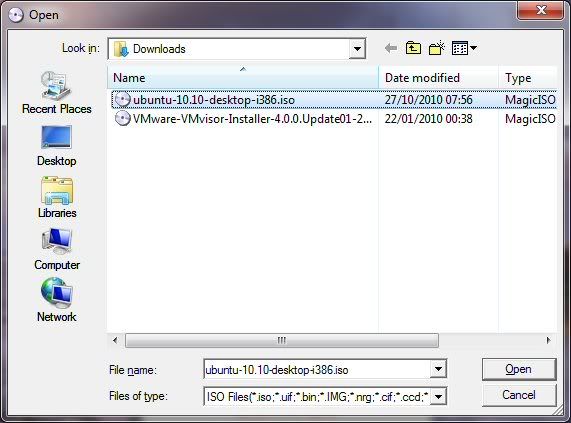
11b. Under the CD/DVD Image File entry, click on the Folder icon to choose the ISO file to burn, then select the Ubuntu ISO file you downloaded earlier and click Open.

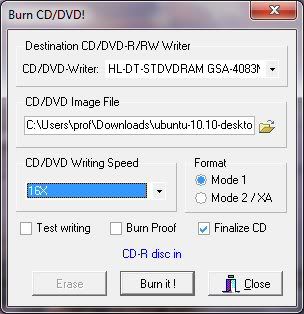
11c. Choose the CD/DVD Writing Speed and tick the Finalize CD box and click Burn it!.

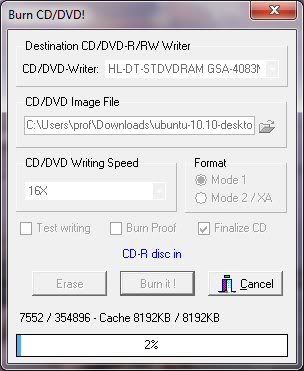
11d. The burn process will now take place. Once completed, the disc should eject and is ready to use.

11e. You can now close the software down.
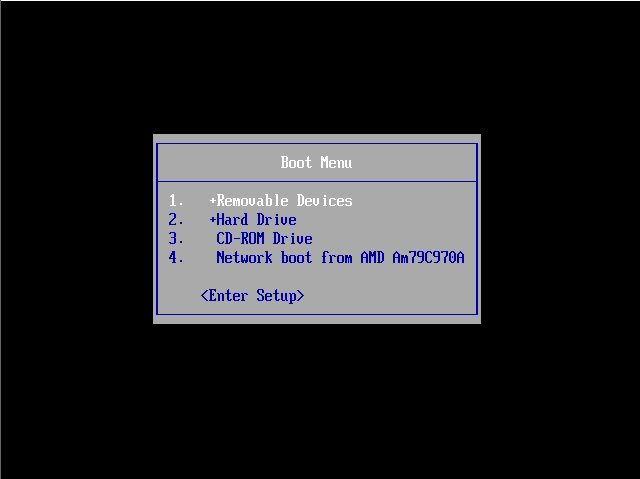
12. With the newly burnt Ubuntu Live CD in your CD drive and the USB disk your recorded programmes on are plugged in, reboot your PC. If you need to, press the necessary key so you can choose to boot from the CD instead of the Hard Disk Drive e.g. on the Lenovo ThinkPad, you press the blue ThinkVantage button. On other machines, there is normally a prompt to indicate which key to press.

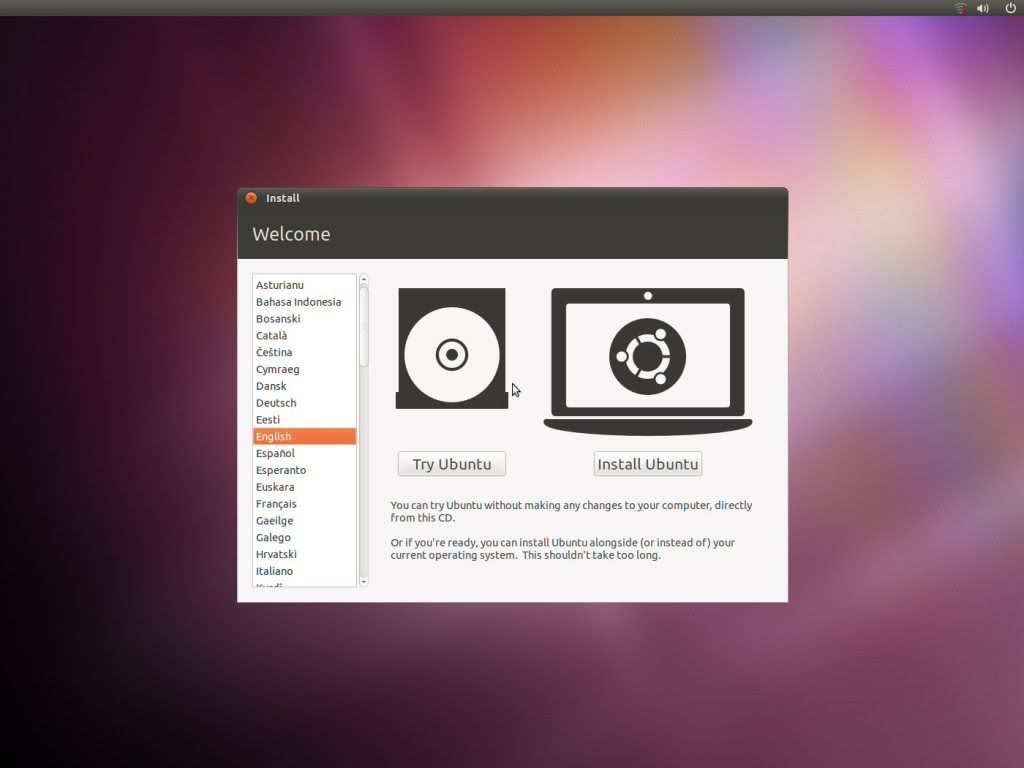
13. At the Welcome menu, click on Try Ubuntu to boot from the CD.

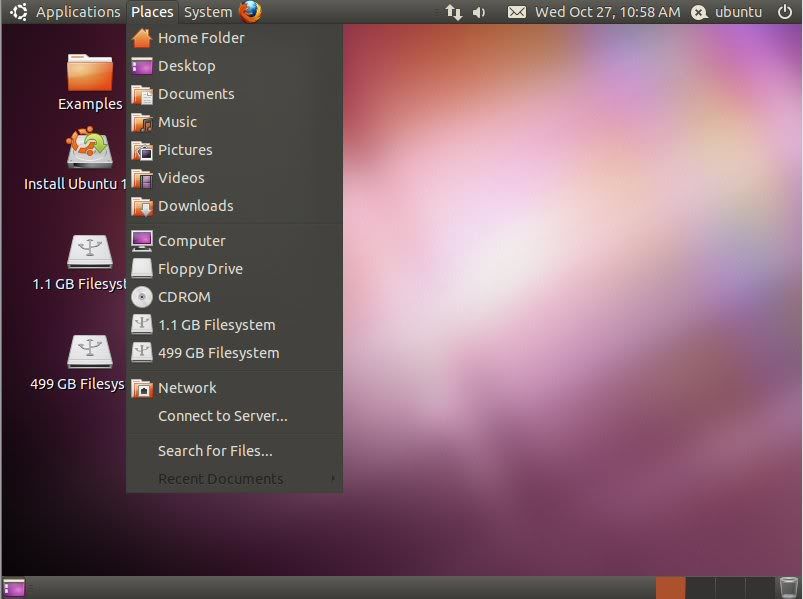
14. Once the Ubuntu desktop has loaded, click on the Places entry at the top to see all the hard disks. You should see at least two Filesystems with a size in front of them e.g. in my case, there was 95 GB Filesystem and 499 GB Filesystem. As I mentioned at the top, I know the 95 GB Filesystem represents my internal hard drive and the 499 GB Filesystem represents my USB drive. When you have worked this out, click on the filesystem here which represents the USB disk.

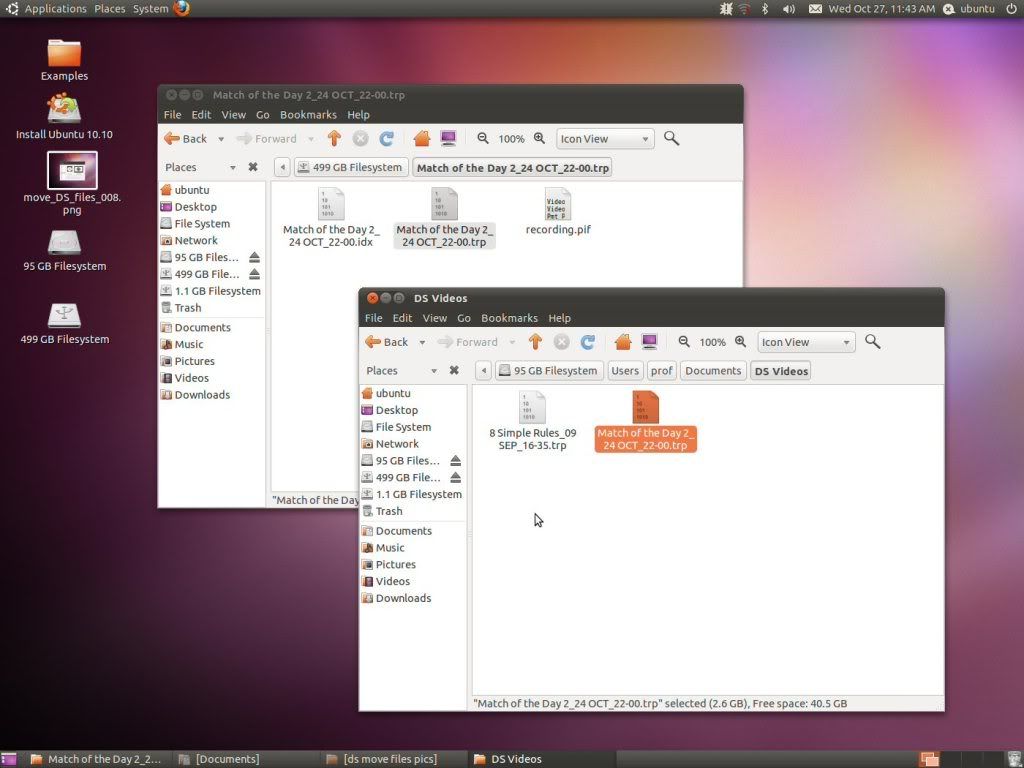
15. You should then see folders representing the programmes you have copied to the USB disk e.g. in the below, you can see 8 Simple Rules, Match of the Day 2 and Top Gear.

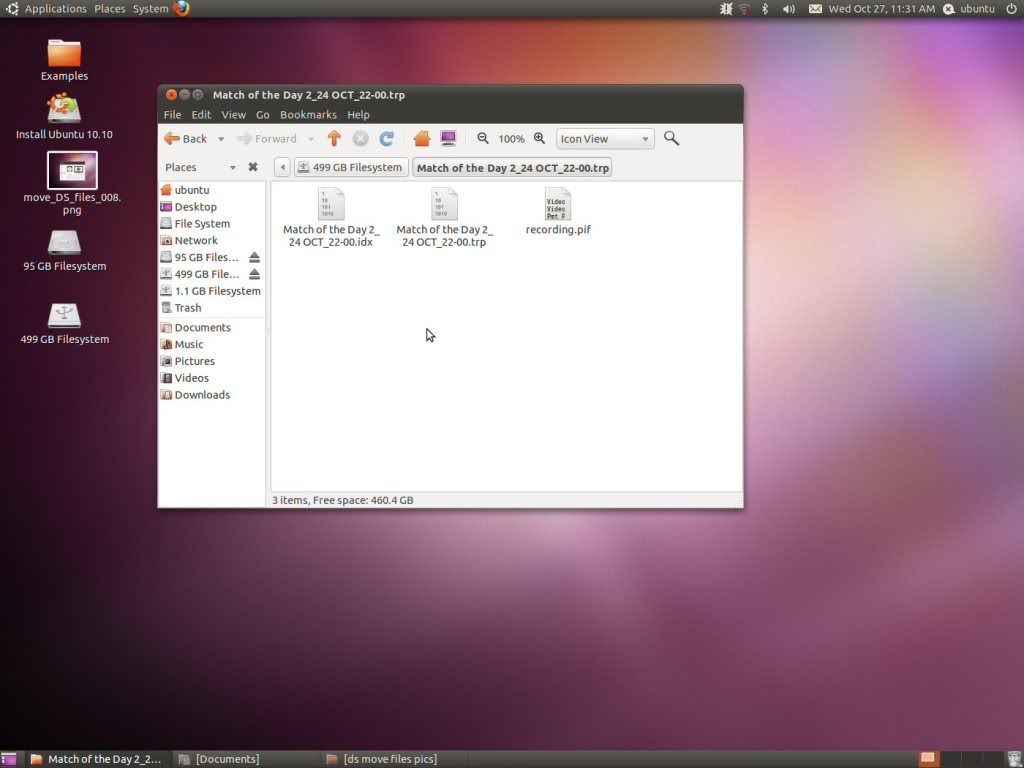
16. Double click into the folder of the programme you want to transfer to your PC to see the individual files e.g. below, it is Match of the Day 2. The file you need ends in .trp so make sure you see which one that is.

17. Now, go back to the Places menu and open the Filesystem which represents your internal PC hard disk.

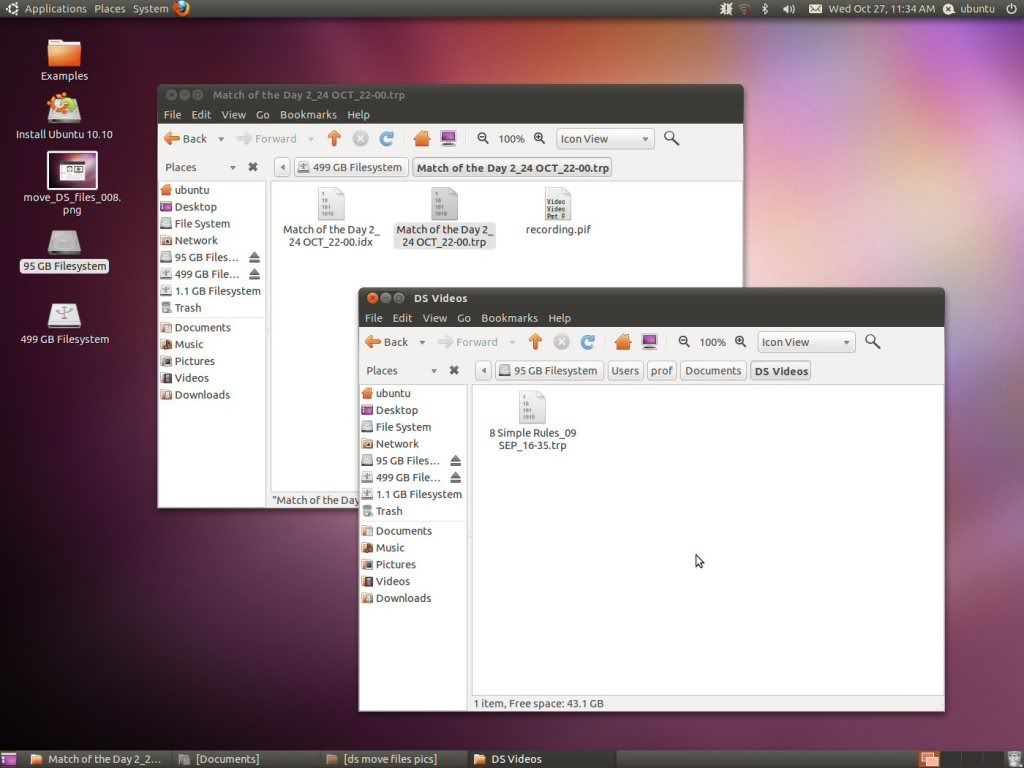
18. Within this, browse to the folder you created earlier where you want to copy the TV programmes to on your internal hard disk e.g. within Windows 7, you'll find your profile under the Users folder, then your Documents folder under this - here I can see my DS Videos folder with the correct permissions set.

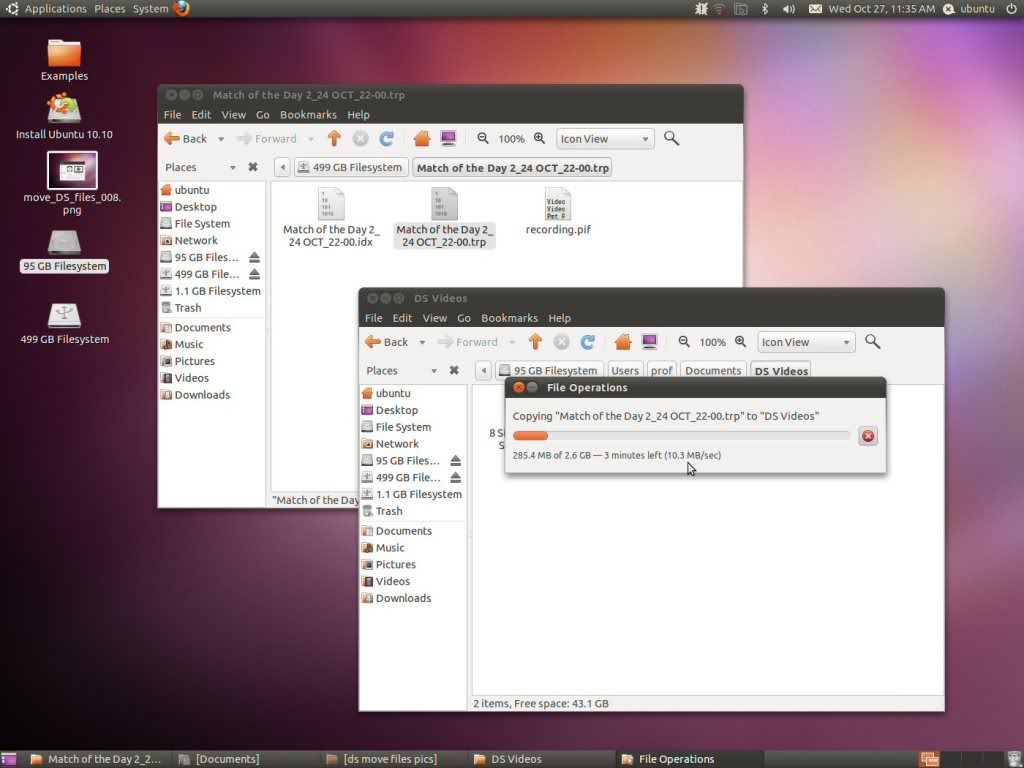
19. Now simply drag and drop the .trp file from the USB disk to the internal hard disk to copy it. You'll see a progress bar to let you know how long it's going to take.

20. Once it's finished, you can then see the file on your internal hard disk.

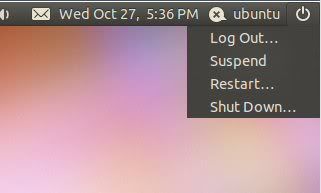
21. Now click on the power icon in the top right hand corner of the screen to get the restart option up and choose this.

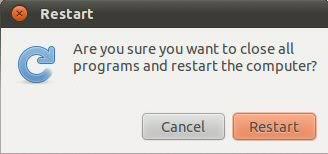
22. Click Restart to restart your PC. You should be prompted to remove the CD and press Enter so that Windows will boot as normal on restart.

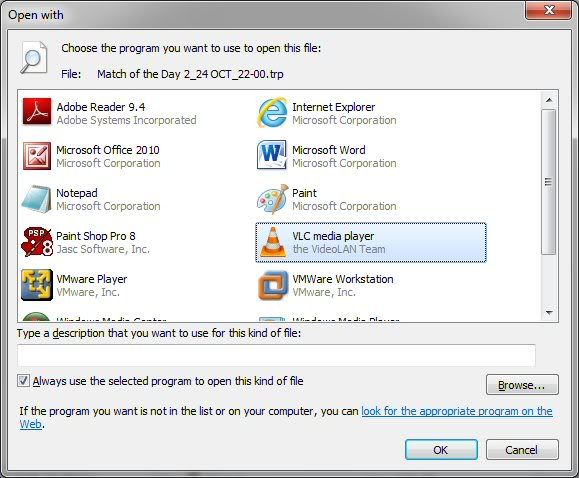
23. Once Windows has reloaded, you can browse to where you copied the files. You can now play these directly through a program like VLC - which you can download here.


And that's it for this session - coming soon is how to convert to different formats (e.g. iTunes) and burn to DVD!
First things first, you need a USB hard drive with at least 160 GB space available on it. Make sure there is nothing on it you want as you'll need to format it from the Digital Stream box. Connect this to the Digital Stream box using a standard USB cable and format it to make it available, then use the white Func+ button to copy the programs to the disk. Full instructions on doing this are already posted in my review of the DS box
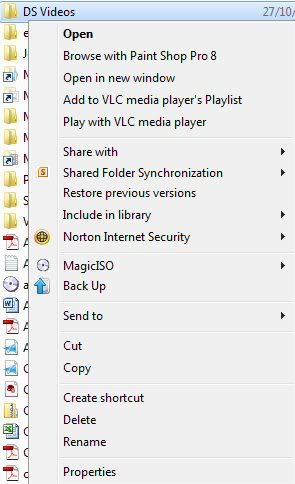
2. Have a look at the permissions in the Group or user names box. If Everyone is not listed there with a tick to indicate Write access, click Advanced. If it does, you can press Cancel and skip this and go to step 9.
3. Click Change Permissions.
4. If ticked, untick the box Include inheritable permissions from the object's parent and click Add to add these permissions explicitly.

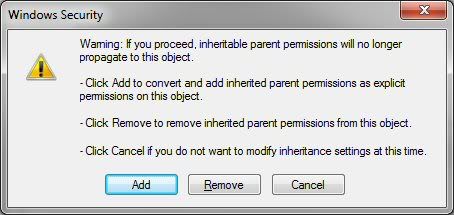
5. Now the box is unticked, click Add.
6. Type Everyone in the Enter the object name to select box and click Check Names - you should see Everyone underlines itself. Click OK.
7. In the window that comes up, tick the Full Control box at the top under the Allow column - all other boxes should then tick then click OK.
NB - if you don't want to allow full control to everyone, you can tailor the permissions to be a bit more secure e.g. in the below screenshot, you can see Everyone only has Read, Create and Write permissions, not Delete.
8. The permissions for the Everyone group can now be seen as you set them. Click OK, OK and OK again to complete the process.


9. Now, download the Ubuntu Live CD from their website by clicking here and clicking on the Start download link.
10. If prompted, click to save the ISO file and choose somewhere to save it on your hard disk, then wait for it to download.
11. Now, you need to burn this ISO file to a CD. However, you don't simply want to copy the file as is to a CD, you need to create a disc from the image contained within it. I personally use a bit of software called MagicISO, but most standard CD / DVD burning software can do it. It's normally accessed from Create Disc from Image or some such description. Step 11a - 11e contains instructions on how to do this using MagicISO. If you have other software, do it with this and skip to step 12. If you're stuck on how to do this, try looking at
11b. Under the CD/DVD Image File entry, click on the Folder icon to choose the ISO file to burn, then select the Ubuntu ISO file you downloaded earlier and click Open.
11c. Choose the CD/DVD Writing Speed and tick the Finalize CD box and click Burn it!.
11d. The burn process will now take place. Once completed, the disc should eject and is ready to use.
11e. You can now close the software down.
12. With the newly burnt Ubuntu Live CD in your CD drive and the USB disk your recorded programmes on are plugged in, reboot your PC. If you need to, press the necessary key so you can choose to boot from the CD instead of the Hard Disk Drive e.g. on the Lenovo ThinkPad, you press the blue ThinkVantage button. On other machines, there is normally a prompt to indicate which key to press.
13. At the Welcome menu, click on Try Ubuntu to boot from the CD.
14. Once the Ubuntu desktop has loaded, click on the Places entry at the top to see all the hard disks. You should see at least two Filesystems with a size in front of them e.g. in my case, there was 95 GB Filesystem and 499 GB Filesystem. As I mentioned at the top, I know the 95 GB Filesystem represents my internal hard drive and the 499 GB Filesystem represents my USB drive. When you have worked this out, click on the filesystem here which represents the USB disk.
15. You should then see folders representing the programmes you have copied to the USB disk e.g. in the below, you can see 8 Simple Rules, Match of the Day 2 and Top Gear.
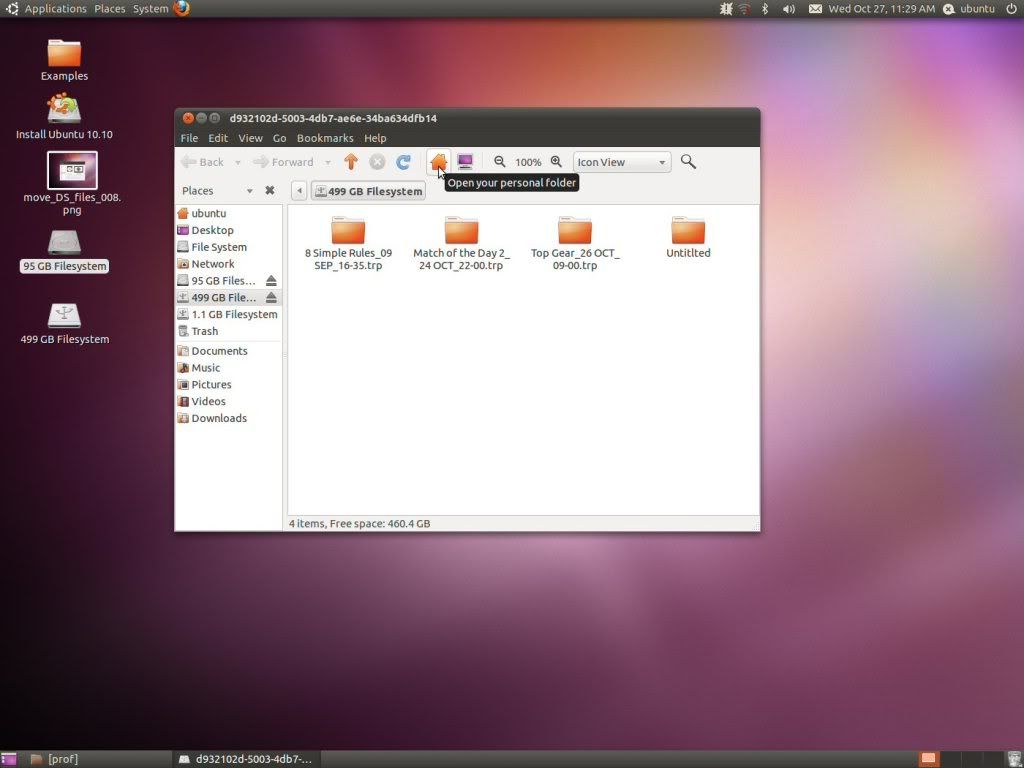
16. Double click into the folder of the programme you want to transfer to your PC to see the individual files e.g. below, it is Match of the Day 2. The file you need ends in .trp so make sure you see which one that is.
17. Now, go back to the Places menu and open the Filesystem which represents your internal PC hard disk.
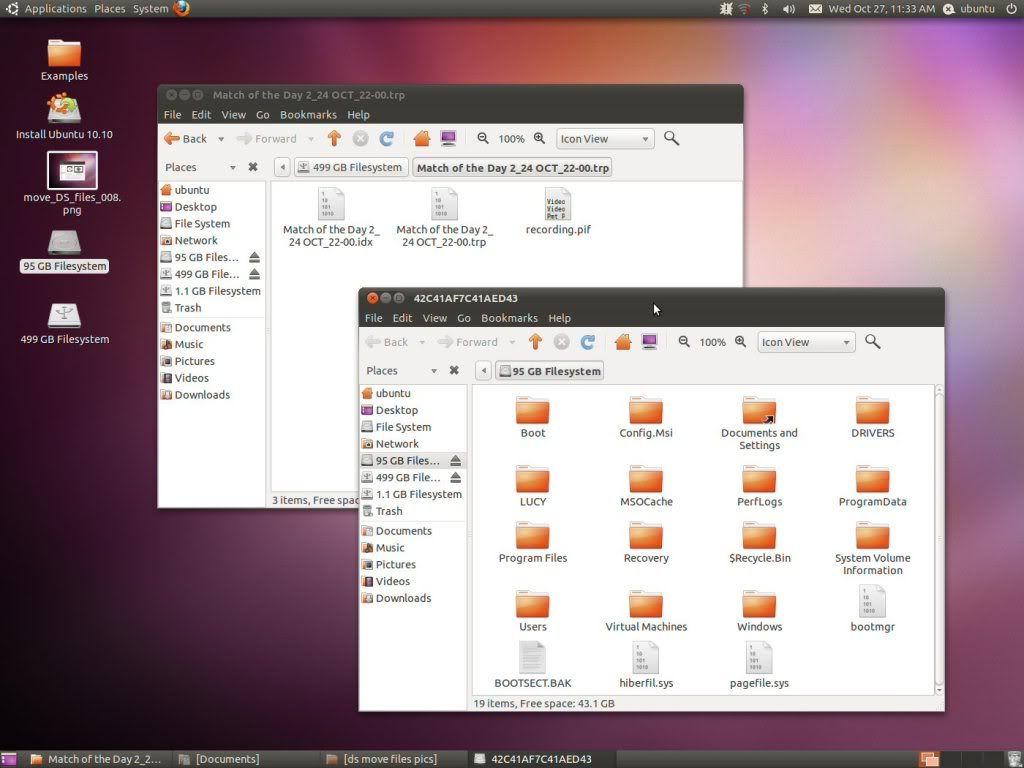
18. Within this, browse to the folder you created earlier where you want to copy the TV programmes to on your internal hard disk e.g. within Windows 7, you'll find your profile under the Users folder, then your Documents folder under this - here I can see my DS Videos folder with the correct permissions set.
19. Now simply drag and drop the .trp file from the USB disk to the internal hard disk to copy it. You'll see a progress bar to let you know how long it's going to take.
20. Once it's finished, you can then see the file on your internal hard disk.
21. Now click on the power icon in the top right hand corner of the screen to get the restart option up and choose this.
22. Click Restart to restart your PC. You should be prompted to remove the CD and press Enter so that Windows will boot as normal on restart.
23. Once Windows has reloaded, you can browse to where you copied the files. You can now play these directly through a program like VLC - which you can download here.
And that's it for this session - coming soon is how to convert to different formats (e.g. iTunes) and burn to DVD!